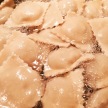
Now that you know how to make your pasta dough and use your Kitchen Aid, you have to decide what type of pasta you want to make. There are many different shapes and sizes you can make with pasta. Some pastas are better with specific sauces than other pastas. There is a reason macaroni and cheese is made with macaroni instead of spaghetti, and Penne Alla Vodka is made with penne. Together we will address the best dishes to make with each pasta.
With the Kitchen Aid Pasta Press you can make any type of pasta you’d like. The Kitchen Aid Pasta Press kit includes the six different pasta shapes, spaghetti, bucatini, fusilli, rigatoni, small macaroni and large macaroni.
When making a thick or meaty sauce such as Bolognese, it is best to use penne pasta. The hollow noodles hold onto the meat sauce, while fettuccine leaves the sauce behind. Do you every wonder why no one ever makes Spaghetti Alla Vodka? Penne al Vodka, my mom’s favorite, is full of onions, cream, ham/pancetta and chopped tomatoes. My mom’s favorite penne al a vodka recipe comes from the 2001 Special Anniversary issue of Gourmet magazine. She has used this recipe for the past decade and has received countless compliments from friends and family.
This is a unique recipe that will be passed down through generations.
My father’s favorite pasta dish is Pasta Puttanesca. Pasta Puttanesca includes capers, olives, garlic, anchovies and tomatoes. I recommend using penne or fusilli. The cork screw pasta holds all the sauce and its ingredients.
Similarly to The Pasta Roller, The Pasta Press is also a Kitchen Aid product and can be purchased at a kitchenware retailer or here on Amazon.
You have the option to make pasta from the six different pasta rings: fusili, rigatoni, bucatini, spaghetti, large and small macaroni. Refer back to the pasta recipe on my third post.
When using the pasta press, make sure to push the dough far into to machine so it can easily filter through the pasta ring.
You can chose the length you would like your pasta to be by swiping the attached blade to cut off the noodles.
The Pasta Roller is easy to use, maybe not your first time, but that’s what directions are for. I’m going to provide you with the steps for using the Pasta Roller.
When I was a young teen using the Pasta Roller for the first time, I didn’t understand the point of using the machine to roll out the dough. Although the Pasta Press doesn’t require you to roll out the dough, the Pasta Roller does. I thought, why couldn’t I just use a wooden roller? After the first couple times using the roller I realized just how much easier it was to have the Kitchen Aid attachment do the work for me. If I had spent the time rolling out the dough I would have be exhausted and the dough might have become too wide to fit into the cutter. After enough practice using the roller, I also learned how to feel the pasta. What I mean by this is when you feed the pasta sheet into the roller, with enough experience you begin to recognize what the perfect pasta texture and thickness feels like. I know just by feeling the pasta when it’s sticky and needs more flour, and when it’s too thick and needs to be rolled out. The Pasta Roller allows you to get your hands involved, but it also doesn’t work you too hard.
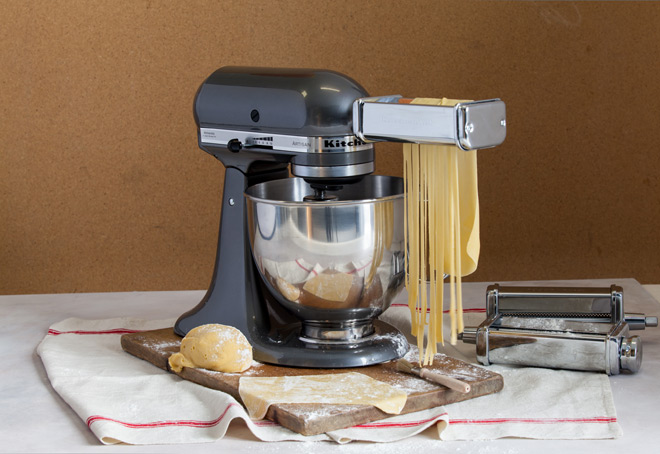
In order to use to Kitchen Aid Pasta Roller, you need a Kitchen-Aid Mixer. The Kitchen Aid Mixer is one of the most useful kitchen appliances, and if you like to cook, this is a necessity. Williams-Sonoma is an excellent store to get any Kitchen appliance. I will provide more information on Williams-Sonoma in my 10th post. You can also easily order it on Amazon here.
For the Pasta Roller, make sure you buy the three set attachment so you can make fettuccine or spaghetti. You can also buy this at Williams-Sonoma or here on Amazon.
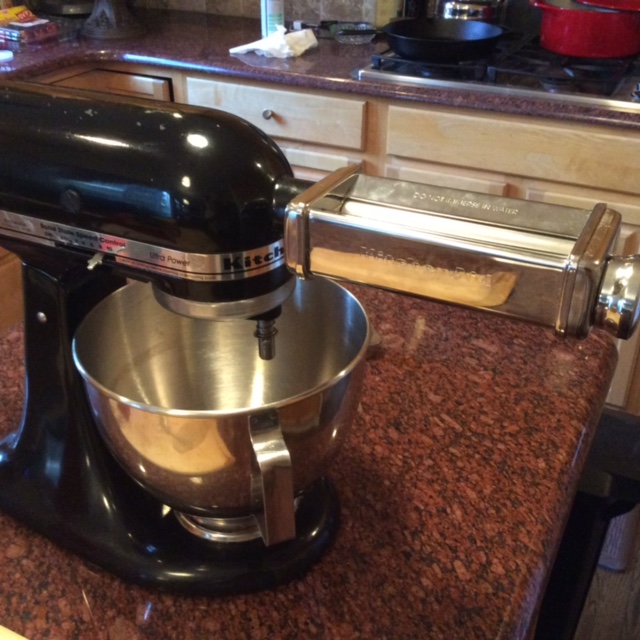
The pasta roller easily attaches to the front of the kitchen aid. All you need to do is remove the small screw, pop the lid off, insert the attachment until you hear a click and twist the screw back in to secure the roller.
If in the last post “Basic Fettuccine Recipe and Spaghetti Recipe” you decided to follow my advice and use the Kitchen aid pasta roller, then you already know a thing or two about the Kitchen Aid pasta maker. In this post I will recommend the two best pasta makers to go along with your kitchen aid. If you used a friend’s or relative’s pasta machine last time I highly recommend you get your own pasta maker. If you already have your own pasta maker sit back and relax while I tell you why these are the best pasta machines.
#1 The Kitchen Aid KPRA Attachment Roller Past Set
When I started my pasta-making pastime, I started off using the 3 piece KPRA pasta roller set, found here on Amazon.
These are the reasons why this is a great product that will provide you with the best pasta that’s easy to make:
The Pasta Roller Set easily attaches to your Kitchen-Aid mixer.
It provides you with the two basic and most popular pasta cutters.
It can easily be cleaned with a wet paper towel and food brush.
It is portable and not heavy like other large pasta machines.
It slices your pasta dough for you and you don’t have to use a hand roller!
It is guaranteed to last for a very long time.
The machine was made in Italy and it receives high reviews on Amazon with 4 1/2 stars
It’s on sale for $154.99 with free shipping and it is worth it!
It is not too difficult to use
This is my favorite pasta set
#2 The Kitchen Aid Mixer Pasta Press
Kitchen Aid Pasta Press
This Kitchen Aid Pasta Roller attachment is also easy to use and it offers a wide variety of pasta shapes. You can buy it here on Amazon.
Some may find this machine easier to use because you can put the dough directly into the press without having to roll it out.
It offers six pasta rings (shape cut outs) for spaghetti, bucatini, fusilli, rigatoni, and large and small macaroni.
I love to use the pasta press to make macoroni and rigatoni, which you can’t do with the three piece pasta roller.
I personally prefer to use the pasta roller because I enjoy rolling the pasta in the machine and feeling its sheet through my fingers. I also find that it is difficult to clean the pasta press because the dough can get stuck in the press and its rings.
*If you want a machine that is less expensive, easier to clean and offers spaghetti and fettuccine, then I recommend the pasta roller.
*If you know you want to make thicker, more sophisticated pasta and a machine that offers that variety, then I recommend the press.
Both are fantastic products that will guide you to make the best pasta you can make!
Note: Look out for my next two posts where I will go into more detail on the two pasta attachments.
As a newbie pasta chef it is best to start out with a simple fettuccine recipe. Every type of pasta according to the kitchen aid recipe has the same ingredients, but there are different techniques for making each pasta noodle.
Follow this kitchen-aid recipe and be sure to use Semolina flour, mentioned in my last post, to get the best quality pasta.
Kitchen-aid pasta recipe
Fettuccine is a thin pasta noodle that is not as delicate as spaghetti, and it is not hollow like macaroni. Fettuccine is also a basic noodle that can be used in many pasta dishes. When I want a quick homemade pasta dish I make simple fettuccine with marinara sauce. You can’t go wrong with this dish!
This is how I recommend you make your own pasta with the Kitchen Aid Pasta Roller, which you can buy here:
After you kneed your dough for 2 minutes, tuck it into a ball and place it in a lightly floured bowl. Cover the bowl with plastic wrap and let the dough sit in the refrigerator for about 10 minutes.
Directions:
After you have let your pasta dough rest, cut the dough ball into FOUR triangles all equal in size.
On each side of the triangle, coat the dough in flour to prevent the dough from sticking to the pasta maker.
With your hands, stretch the dough into the form of a small square.
Flatten the square dough so it is a little thicker than the pasta roller at the first notch.
Attach the pasta roller to the kitchen aid and set the notch at width 1. Make sure it is screwed in and secure.
Turn the kitchen aid mixer to the slowest speed.
Feed the square dough through the roller with your right hand and catch the flattened dough with your left hand.
Do this three times then sprinkle flour on both sides of the dough sheet to eliminate any stickiness.
Switch the roller to notch 2 and feed the dough through the roller twice.
Repeat this step for each notch up to 5.
After inserting the dough through the roller twice at notch 5, the pasta should be thin enough where you can see the shape of your fingers through the sheet of dough. The pasta should be about a quarter to half a millimeter thick and 2 ½ to 3 feet long.
Sprinkle Semolina flour on both sides of the sheet of dough and smooth the flour out over the surface of the dough. Lay the pasta gently on a long piece of wax paper.
Use a smooth knife to cut the long sheet of dough in half.
Repeat steps 2-13 for the other quarters of dough.
Use five pieces of wax paper to create layers of pasta in order to separate the dough and prevent sticking.
From your kitchen aid pasta maker kit, take out the fettuccine pasta cutter attachment.
Fettuccine Cutter
17. Attach this to your kitchen aid mixer.
18. Put each sheet of pasta through the cutter and very gently catch the strands of pasta as they fall through the bottom of the cutter.
19. Gently separate the strands of pasta with your fingers and drop them in a small bowl of flour.
20. Make sure the fettuccine strands are covered in flour, then move the fettuccine over to form a pile on the wax paper.
21. Do this until you have reached the preferred measurement of pasta for your meal.
22. Drop the fettuccine into a boiling pot of water and wait only 3 minutes until the pasta is al dente.
Spaghetti (more arduous):
When making spaghetti, be aware that the noodles are thin and delicate, and it is possible that the noodles will stick together.
*This causes the spaghetti making process to be more challenging than the process for fettuccine.
Spaghetti Cutter
After completing steps 1-15 take out the spaghetti cutter attachment.
Feed the pasta through the spaghetti cutter and gently retrieve the strands.
Immediately drop the spaghetti into the bowl of flour and gently mix the strands into the flour by pulling the pasta with the tips of your fingers.
Drop the pile of spaghetti onto the wax paper. Many of the strands will be stuck together.
Find each split end on the spaghetti strands and very delicately pull the strands apart to split the spaghetti.
This has to be done carefully to avoid breaking the spaghetti. It is okay if the spaghetti breaks before you completely seperate the strands, just continue to separate the rest of the strands.
This may take awhile depending on how much spaghetti you decide to make. To make the process easier and faster I recommend you have one other person help you separate the noodles. Also, I recommend you pull at the strands quickly, but still gently.
Spaghetti directly after cooked.Delicious spaghetti in a red sauce.
After you purchase your own pasta machine, I recommend you follow the Kitchen-aid pasta recipe. It is the simplest recipe and it has better results than online recipes. The Kitchen-aid recipes provide you with instructions to make the smoothest, tastiest, most malleable pasta. In both my own experience and my grandparent’s experience, we have had undesirable results from recipes on other websites. Recipes that call for more than 4 eggs and less than 3 cups of flour will be too sticky, causing damage to the Kitchen-aid, and creating difficulty in the pasta making process. Recipes with more than 2 1/2 cups of flour and less than 3 eggs will be too dry, preventing the ingredients from mixing into a smooth ball of dough. As for the pasta flour to use, I recommend using Granoro Semolina flour. Granoro Semolina is a better pasta flour than Red Mill or other flours, because it the softest flour, which helps create the softest pasta.
Kitchen-aid created their pasta machine, and know what recipes produce the best pasta. The kitchen-aid recipe pamphlet comes with your pasta maker order. If you follow these instructions, your new pasta making experience will be easy.
There are two different pasta attachments from kitchen-aid that produce the best pasta. In a few posts I will blog about both attachments, how to use them, and which one I prefer.
I come from an Italian family. I was a young teen when I had my first taste of homemade pasta. I was visiting my grandparents in late August when they told my parents and me about their recent discovery, the Kitchen-aid pasta maker. They had gone to a cooking class where they were introduced to the pasta roller attachment and the concept of making fresh pasta.
My grandparents are very adventurous; they love to travel and are always changing. They produce their own vegetables in their garden and prefer to make homemade meals. They were curious and excited to use their first pasta maker. When they had prepared their first homemade pasta dish for me, fettuccine in red sauce, I couldn’t believe I was eating pasta. My expectations of pasta had permanently changed. The texture of the homemade pasta was softer than boxed, not soggy, but easier to chew and more enjoyable. The taste was also distinctly different. When you eat a freshly picked apple compared to a store brand apple, you can taste that difference in freshness. It is the same taste of freshness with homemade pasta. Boxed pasta is drier and does not have that fresh homemade taste.
I was determined to make my own homemade pasta. After we had bought our kitchen-aid attachment we made pasta all the time. We started off with the basic fettuccine, then we started to make different types of pastas such as macoroni, spaghetti, and fusilli. There were so may different meals we could make with the Kitchen-aid and just 4 ingredients. We made macaroni and cheese, puttanesca, penne alla vodka and more. Our expectations of pasta has changed forever, and so has mealtime. My family and I look forward to making pasta together, when we can be creative, spend time together and eat healthy.